
Cybersecurity Homelab
Cybersecurity threats are always changing, so it’s important for experts to stay updated and sharp. To accomplish this, a cybersecurity homelab is a great project for new graduates to showcase their skills. A home lab, which is a smaller version of a commercial network, can be set up at home. In a risk-free setting, you can try out new technology, improve your abilities, and practice for real-life situations.
Homelab Topology
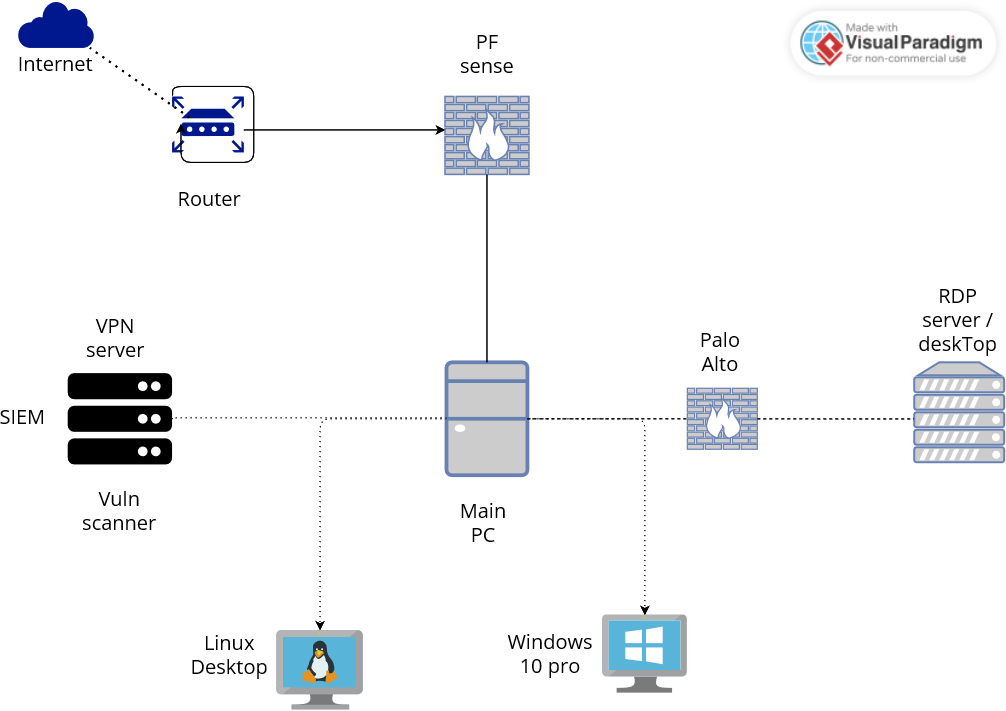
Setting Up a Centralized Active Directory Environment for a Homelab
Active Directory (AD) is a directory service developed by Microsoft for Windows domain networks, enabling centralized management of permissions and access controls. It operates on a hierarchical structure, consisting of a domain, a Domain Controller (DC), Organizational Units (OUs), a Forest, and Trusts. Each domain manages unique objects, enforces security policies, and stores user credentials and permissions. AD is essential for IT administrators in medium to large organizations.
A centralized Active Directory environment is crucial for managing and organizing network resources, such as user accounts, computers, and security policies. By integrating AD into your homelab, you can gain hands-on experience with this critical technology, which is widely used in enterprise networks.
Planning Your Active Directory Setup
To create a centralized Active Directory environment, you’ll need to carefully plan your setup. The key components of your homelab will include:
- Main PC: This is the central device that will host all your virtual machines and manage your homelab. For this project, I will be using Windows Server 2022 as our Main PC.
- Windows Server VM: This VM will run Windows Server and act as your Active Directory Domain Controller (DC). The DC is responsible for authenticating and authorizing all users and computers within your network domain.
- Workstations: These will be additional VMs running operating systems like Windows 10 and various Linux distributions. These workstations will join your AD domain and can be used to simulate employee computers in a business network.
Configuring the IP Address
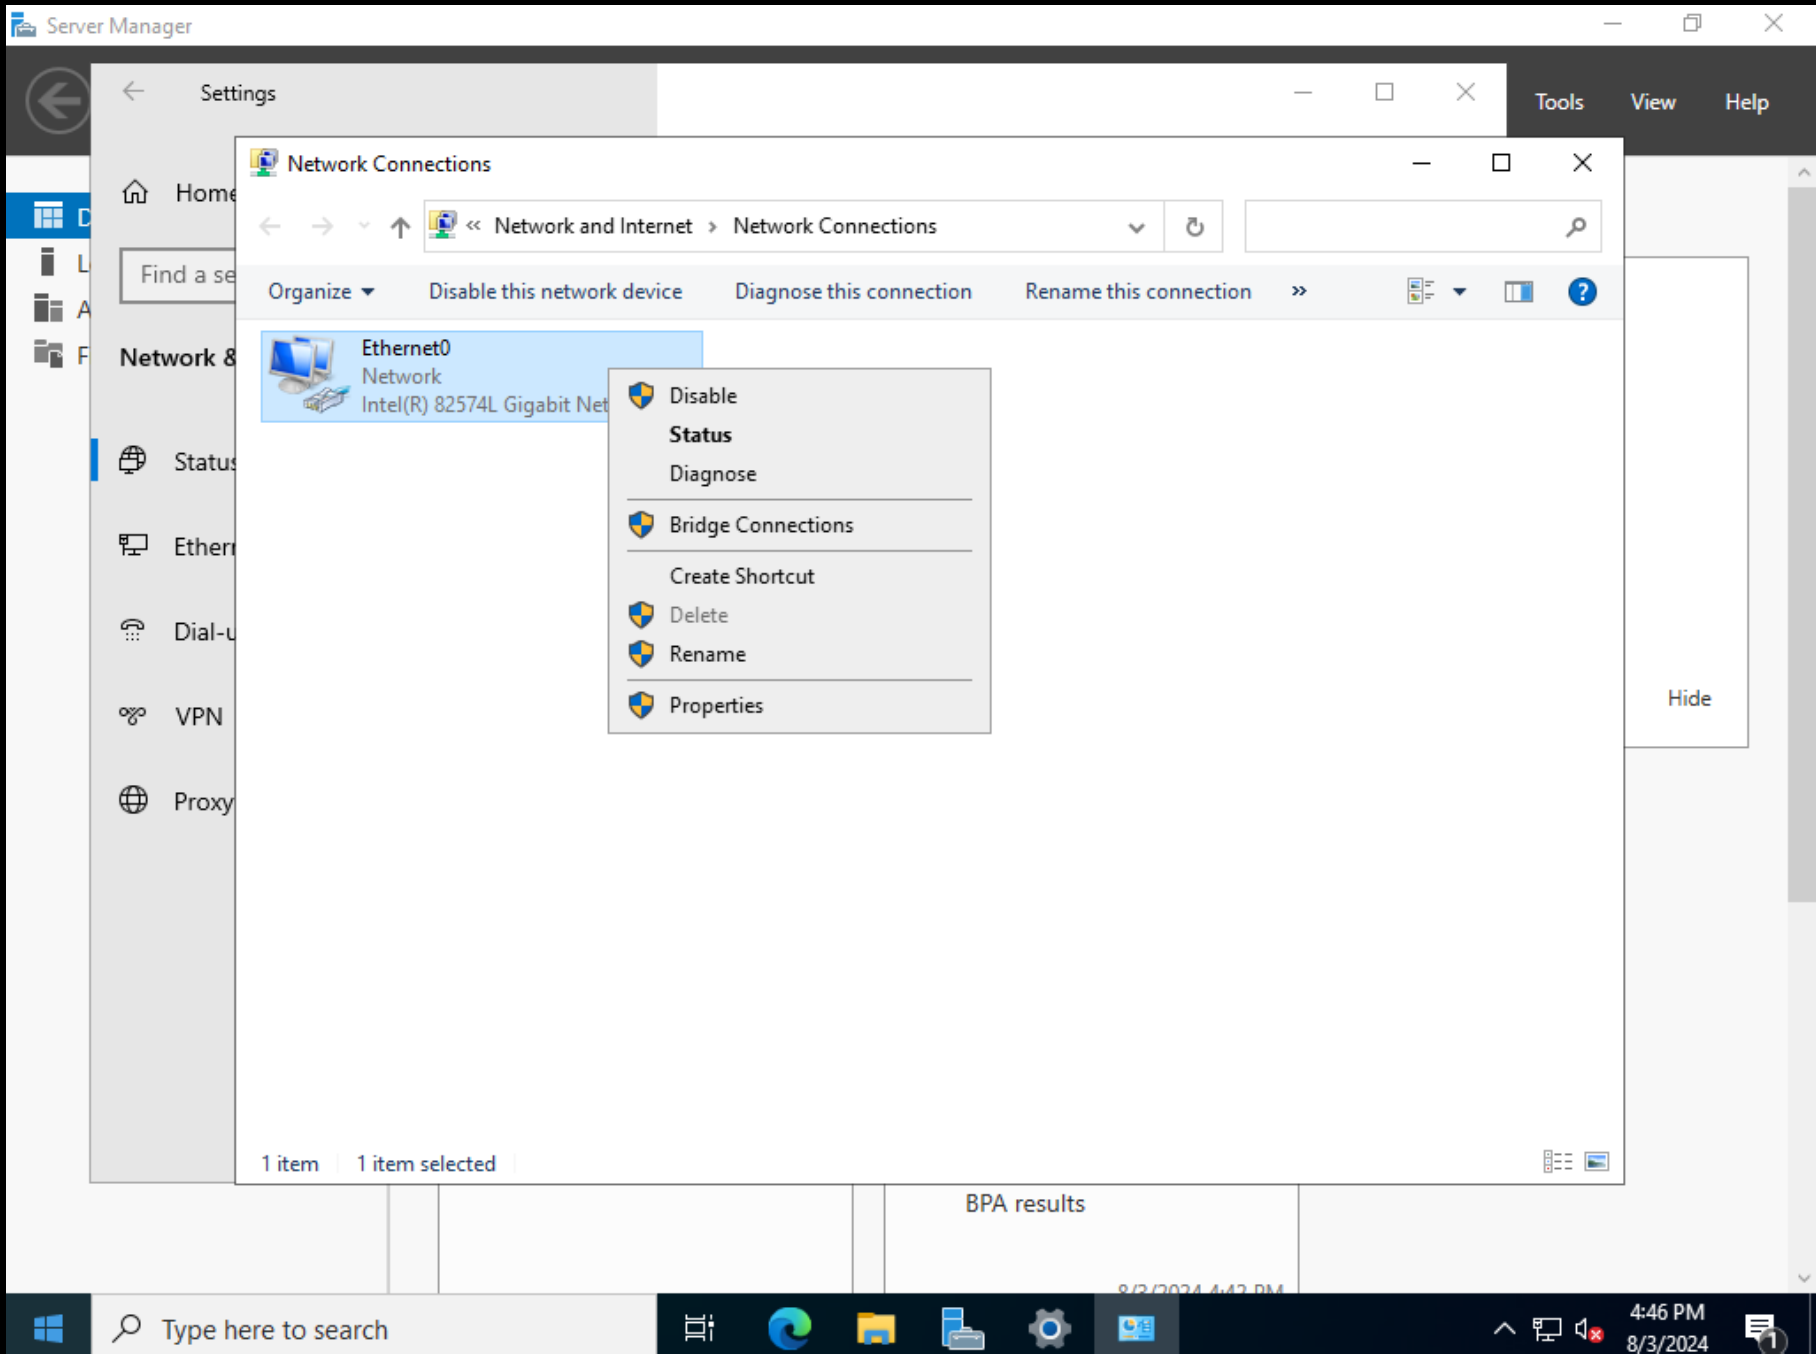
Open the “Network and Sharing Center” and click on “Change adapter settings”: Right-click on your network connection (Ethernet0) and select “Properties”.
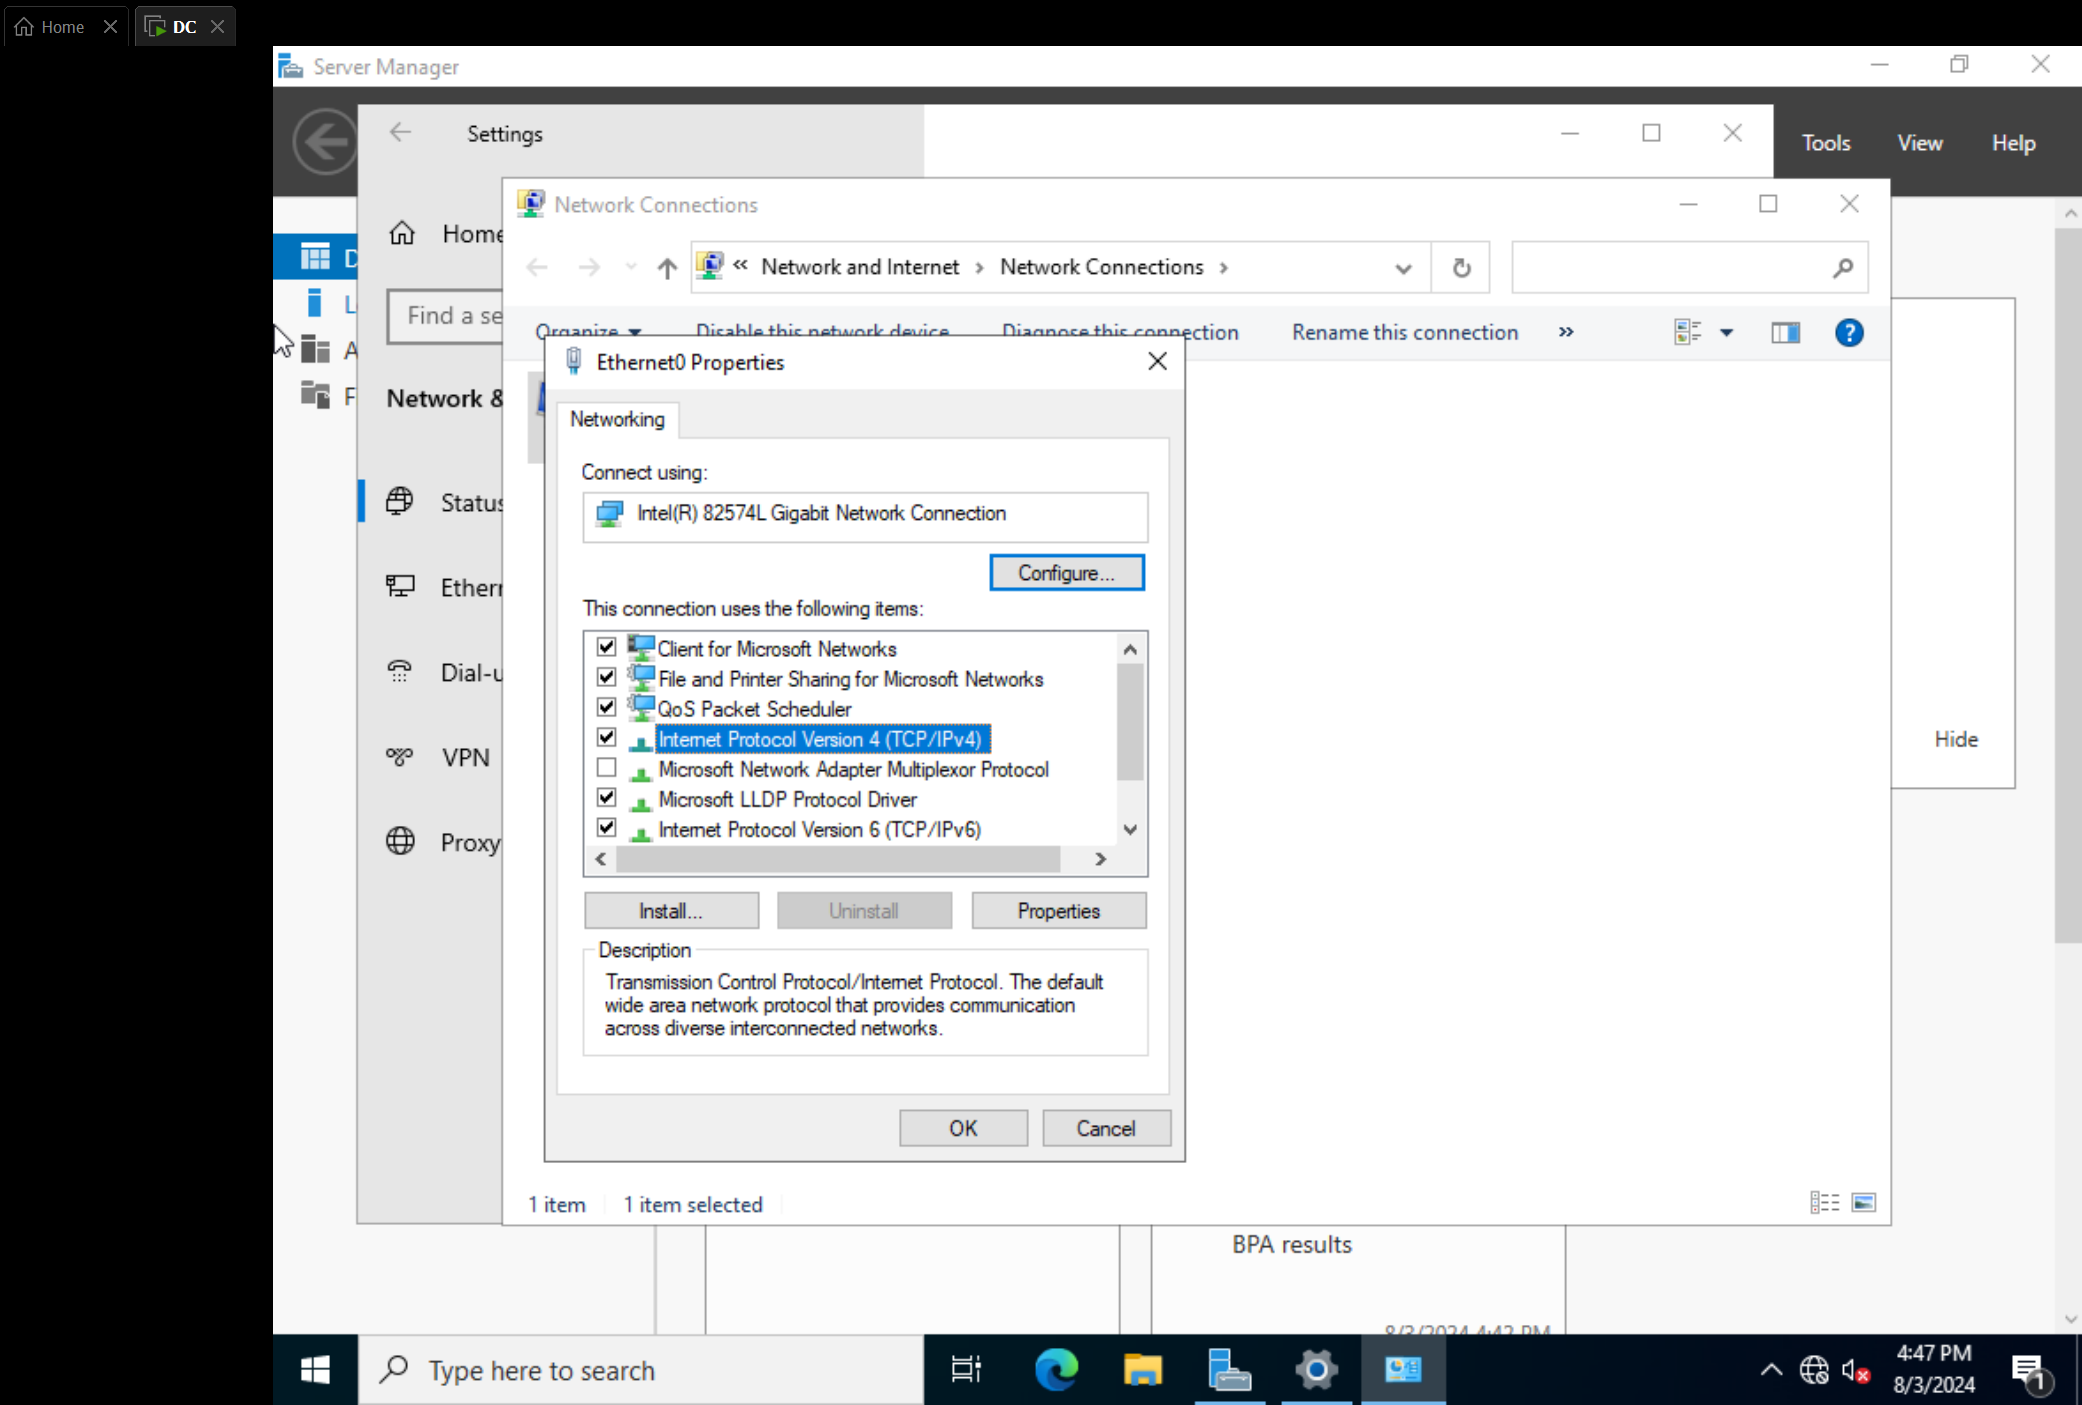
In the “Ethernet Properties” window, select “Internet Protocol Version 4 (TCP/IPv4)” and click “Properties”.
Select “Use the following IP address” and enter your desired IP address, subnet mask, default gateway, and DNS server addresses:
- IP Address: 192.168.16.3
- Subnet Mask: 255.255.255.0
- Default Gateway: 192.168.16.1
- Preferred DNS Server: 8.8.8.8 (Google DNS)

Installing Updates
- Go to “Settings” -> “Update & Security” -> “Windows Update”.
- Check for and install all available updates to ensure your server is up-to-date.
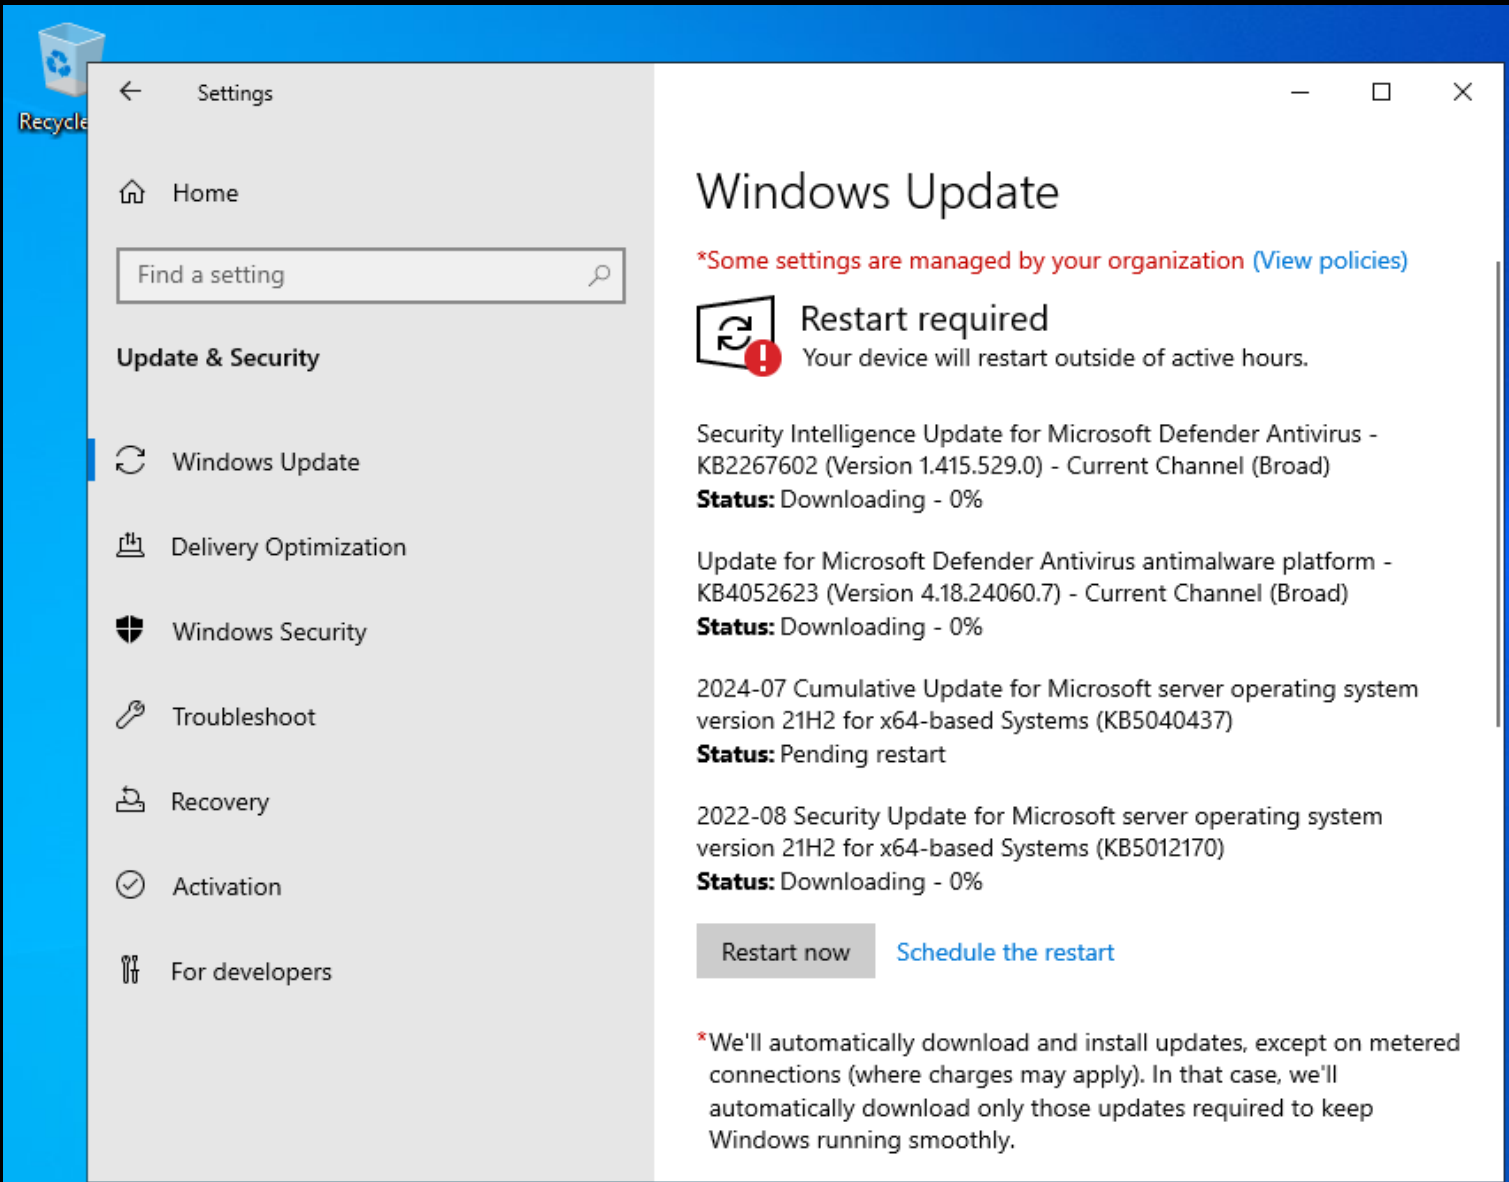
After installing the update, restart your server. This concludes the static IP assignment for the Main PC (AD DS). The next steps would be setting up DNS and DHCP in Active Directory.
Setting Up DNS and DHCP in Active Directory
DNS in Active Directory
DNS resolution services enable customers to locate Domain Controllers and for the Domain Controllers hosting directory services to interact with each other. AD locates items within it using DNS.
Configuring DNS in AD will require a reverse lookup zone. Designed mostly for resolving IP addresses to network resource names, a reverse lookup zone is an authoritative DNS zone. Without setting a reverse lookup zone, you cannot map IP addresses within the zone to the hostname.
DHCP in Active Directory
While still under direct control from the Domain Controller with AD installed, Dynamic Host Configuration Protocol (DHCP) lets the Domain Controller send out IP addressing information so that clients can communicate with other computers and services.
This is why you will have to install and set DNS and DHCP in AD to enable the whole procedure to run smoothly.
Steps to Configure DNS and DHCP in Active Directory
Install Active Directory Domain Services (AD DS) and DNS
Open Server Manager, click Manage, and select Add Roles and Features.
Select Active Directory Domain Services, add required features, and proceed with the installation.
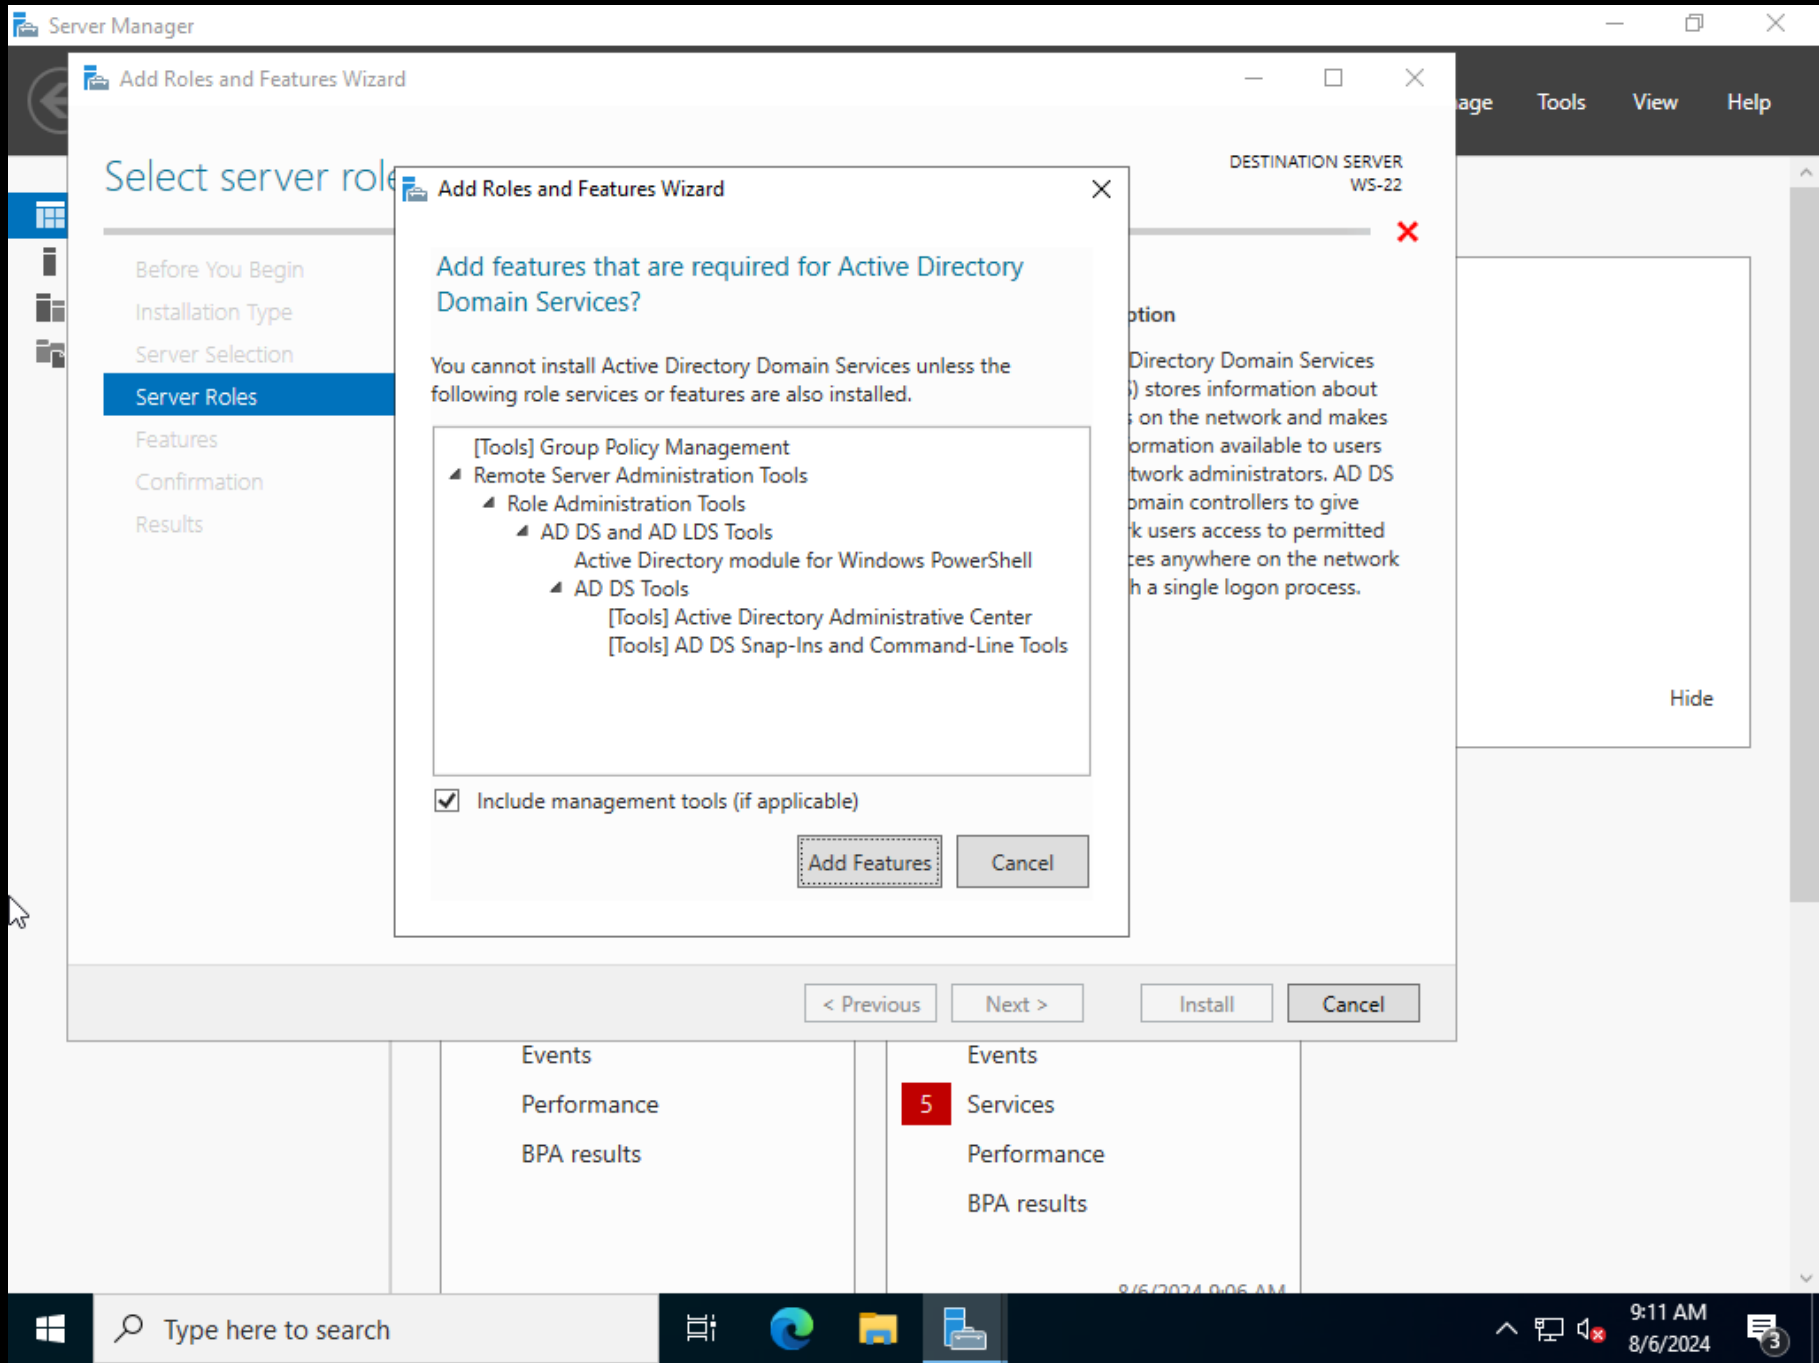
Click the Flag icon in Server Manager and select Promote this server to a domain controller.
Add a new forest, enter your domain name (e.g., yourdomain.local), and complete the wizard.
Configure a Reverse Lookup Zone
- Open DNS Manager from the Tools menu in Server Manager.
- Right-click on Reverse Lookup Zones and select New Zone.
- Follow the wizard to create a new reverse lookup zone.
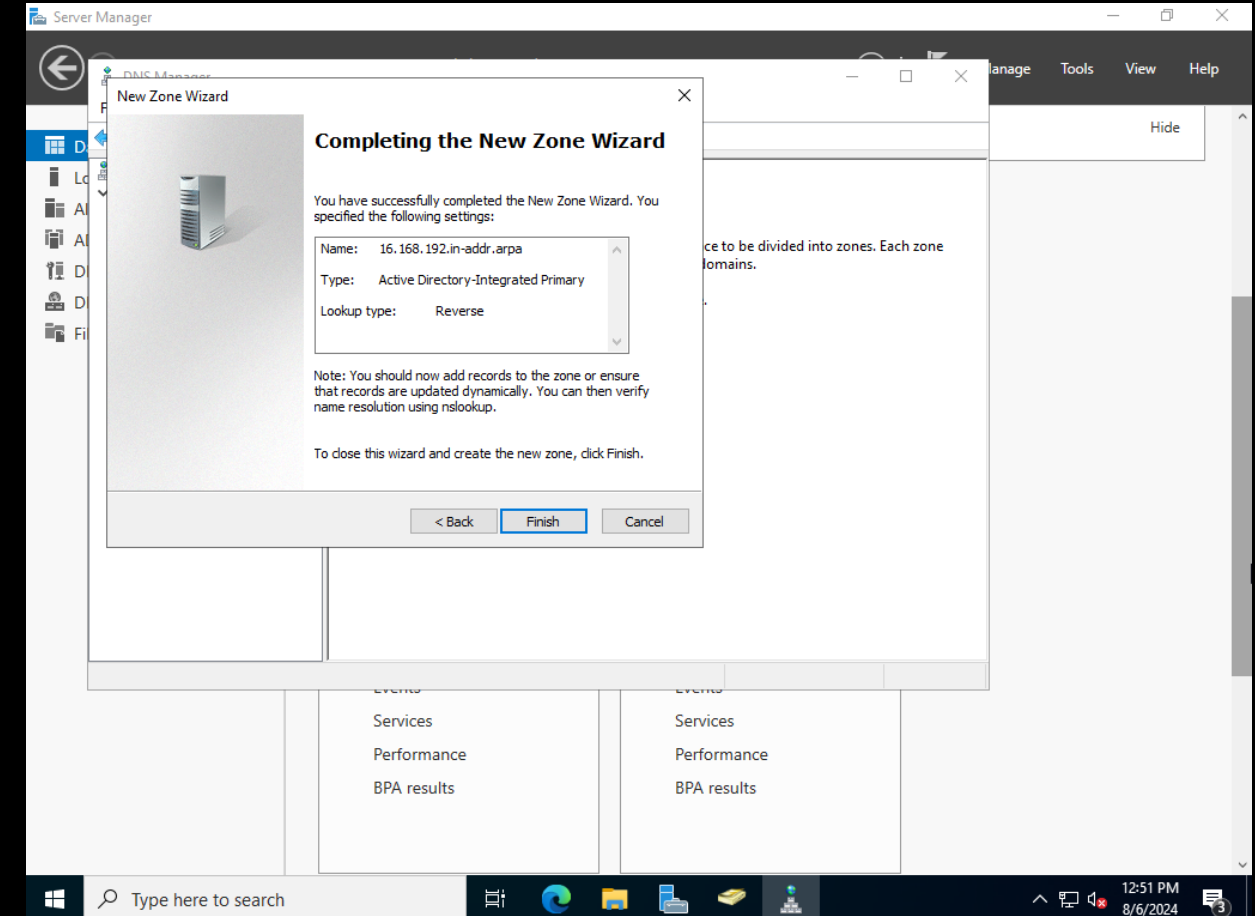
- Install and Configure DHCP
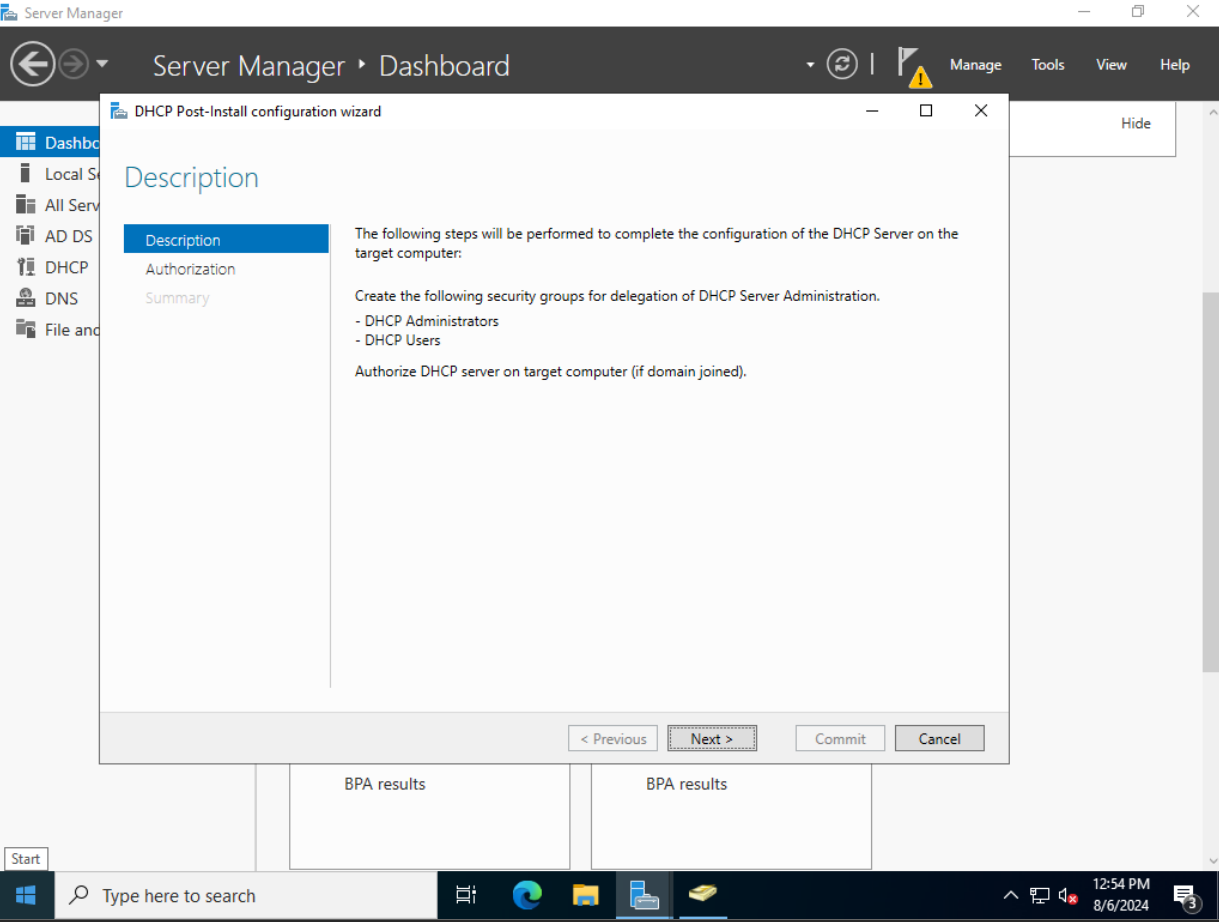
- Open Server Manager, click Manage, and select Add Roles and Features.
- Select DHCP Server and proceed with the installation.
- After installation, click Complete DHCP Configuration.
- Open DHCP Manager, right-click IPv4, and select New Scope.
- Enter the IP range and complete the wizard.
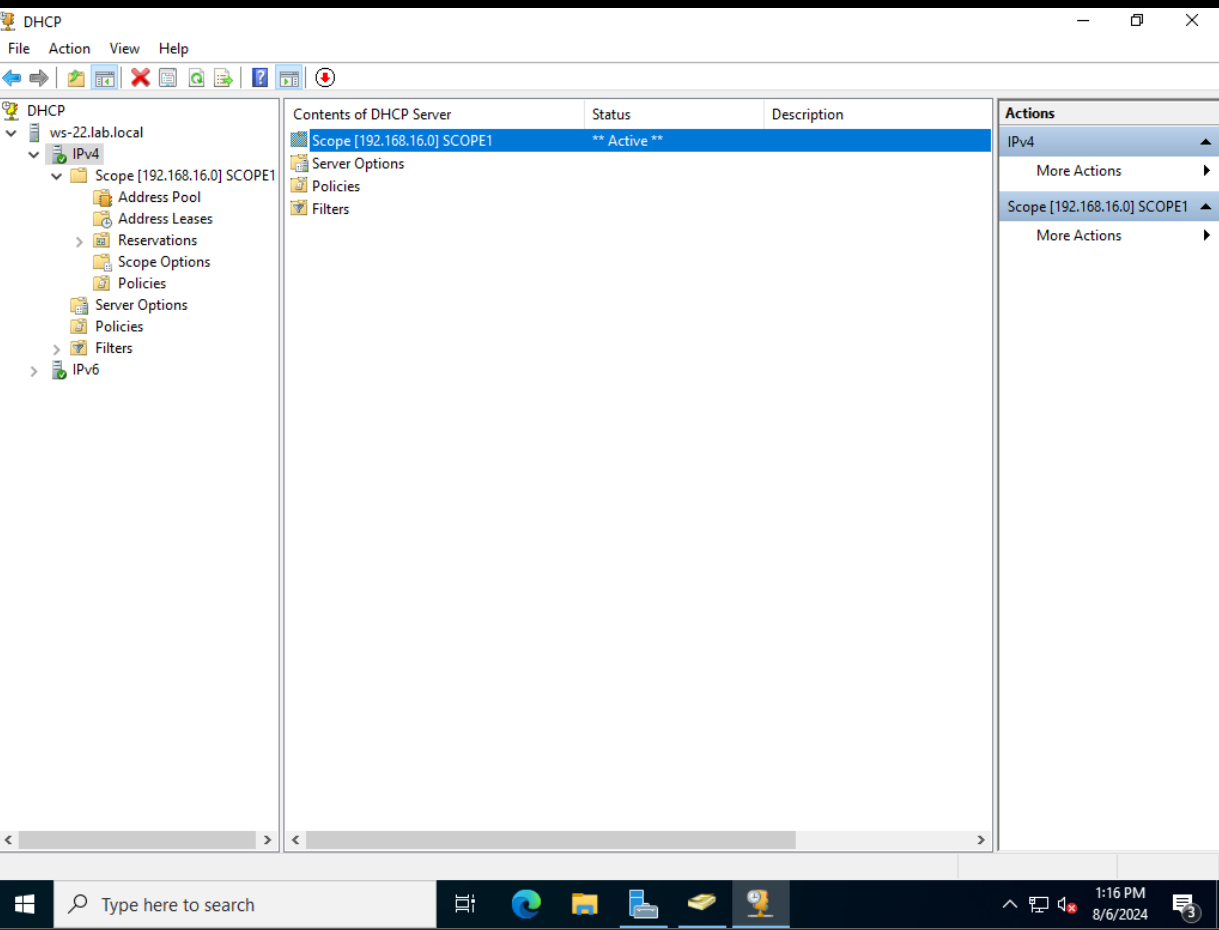
By following these steps, you will set up a functioning Domain Controller with DNS and DHCP, ensuring efficient network management and seamless device integration.
Testing Your Active Directory Setup and Services
I wanted to check if everything worked after effectively following and completing the first configurations and setup for AD on the Windows Server 2022 VM. I first downloaded a Windows 10 Enterprise Edition virtual machine to accomplish this. I was able to achieve this after researching how I could configure Windows to acquire IP addresses from the WS-22, primary PC.

Summary
In this part of the Cybersecurity Homelab project, we learned what Active Directory is, why we use it, and how it links to cybersecurity. We also learned how to set up AD for a home lab environment with DNS and DHCP, as well as how to test and connect a Windows 10 Enterprise Edition to the network. In the next part of this project, I will set up basic RDP servers and install and connect Linux and Windows 10 machines.